Authentication
We use OAuth 2.0's Authorization Code Grant in order to connect integrations to user's farms. It works as follows:
- You ask the user to grant permission for your integration to access their farm.
- You request an access token from our API
- You access protected resources using this access token
Connections are made between integrations and farms, not users. This means that if you need to connect to multiple farms you'll need to use the authorization flow once for each farm.
Scopes
An integration's access to read or write data is limited by the permissions that they request from the user during authorization.
Each connection between integration and farm has its own set of permissions, or scopes, associated with it. Each method in our APIs may require a particular scope in order to access it.
The following scopes are used by our APIs:
| Name | Description |
|---|---|
fields:read:all |
Access all of the fields and boundaries |
maps:write |
Create farm maps and field maps |
vehicles:write |
Provide location of farm vehicles |
sensors:write |
Provide sensor readings |
alerts:write |
Create alerts for issues on the farm |
It is generally assumed that an integration has read access to any data that it has created. The fields:read:all scope is required when an integration wants to read all fields, including those created by humans and other integrations.
If an access token is missing a required scope it will receive a missing_scope error response. You can check permissions using the permissions Web API method.
Requesting additional scopes
We recommend that you only request scopes as you require them. If at a later point you need additional scopes, or if the user wishes to use optional functionality, you can send them back through the authentication flow. Any new scopes that you request will be added on to the existing access token.
Step 1: User authorization
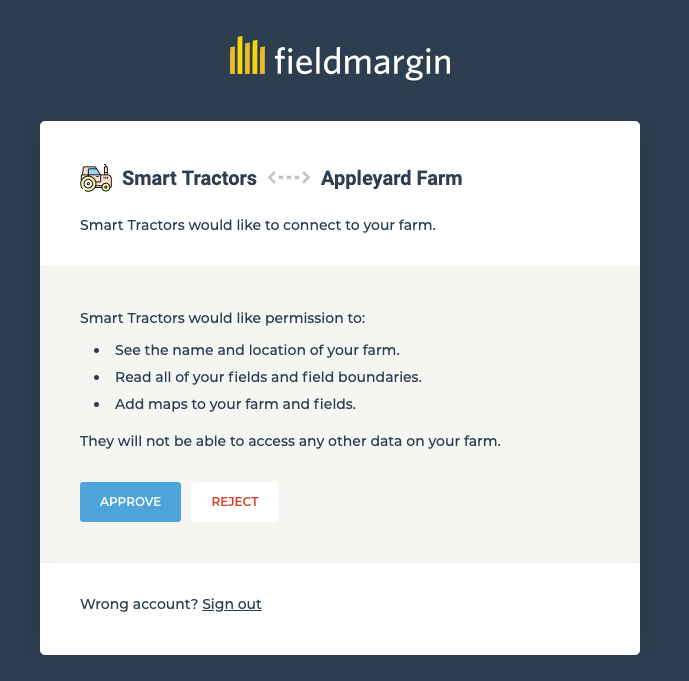
The user needs to agree that a connection can be formed between your integration and one of their farms. They also need to agree to you being able to read and write their data.
To do this, your website should redirect the user to the following URL:
https://account.fieldmargin.com/authorize
The following GET parameters should be set:
| Name | Required | Description |
|---|---|---|
client_id |
Required | The client ID of your integration |
scope |
Optional | Space separated list of scopes that your integration will need (see list above) |
state |
Optional | Unique string that will be passed back to you on completion |
The state parameter can be used to ensure that authorization requests originate from your server. We'll return this value back to you in Step 2 so that you can verify it.
The user will see a screen similar to the one shown below. Each scope that you request will be listed for the user to see and they'll make a decision on whether to approve or reject.
Step 2a: Generating an access token
If the user grants you access to their farm they will be redirected to the redirect_url you specified in your integration configuration, with the addition of a code parameter and the state parameter you provided in Step 1.
If the state parameter does not match then the request may have been made by a third party and you should not continue.
Example request
code=8e238cff0e2f40b7b0fea3629d7f5738&client_id=dbb01ddf193c4a8c&client_secret=4524ae377d4a4a7599b5be56e7a8a630
To generate an access token send a POST request to the token.exchange Web API method with your code, client_id and client_secret as a application/x-www-form-urlencoded query string or POST body.
Example response
{
    "access_token": "b0ac977a46174334ad453ed9f515a38e",
    "farm_id": "76530ceb-6720-4a1e-a28d-124cbee922c9"
}
The JSON response will contain your access token and the ID of the farm which the user chose to connect to. This token will not expire after a fixed period of time, but may be revoked by the user or the token.revoke Web API method.
Step 2b: Failing authorization
If the user does not agree to grant you access they'll be redirected to your redirect_url with an error parameter set.
Step 3: Using our APIs
Now that you have an access token you can send authenticated requests to the Web API. The token should be added as a header to each of your requests:
Authorization: Bearer <ACCESS_TOKEN>
You may find it useful to call the permissions Web API method to check that your access token is valid and has the scopes that you need in your application.
If you are using the Data API you will also start to receive requests for this newly connected farm.